Types of C-stands & how to use them
This is a tutorial on how to use a C-stand. Our goal was to cover every important aspect, from types of the stands, to organizing them on the set. We hope You find it useful.
Types of C-stands
Three types can be distinguished, with the difference being the stand’s base.
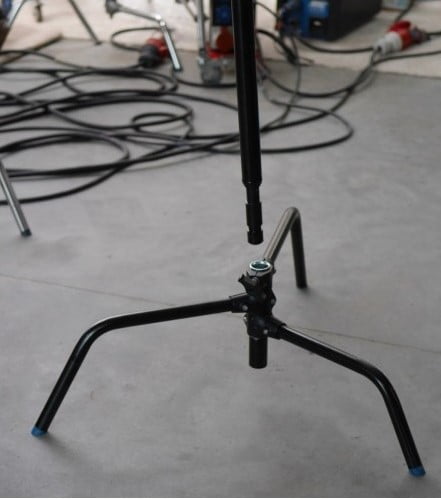
Detachable turtle base
Bottom tripod is called turtle base and stand’s column is detachable

Just like in any other C-stand, the turtle base is foldable, which makes it much easier to transport.
The legs are spring loaded and each one will fit perfectly in it’s place, thanks to a special cut-out.


Next feature of the turtle base is that it’s detachable and therefore can be used as a very short stand alone. To do it, just release the knob, take the riser out and replace it with a standard 1 1/8” stud.

Sliding Leg C-Stand
The other type is, because of it’s construction, usually referred to as the sliding leg. Besides being able to fold flat, just like the turtle base, it’s able to compensate the ground’s tilt.
It can be used on a stairway, a hill, or wherever needed. The sliding leg is always the biggest one, so the grip arm, or anything attached to the stand will be facing uphill. One downside of this is that the base cannot be detached.
Standard
Turte base is attached to the riser section permanently. You can use this stand on flat surfece. It is the cheapest type.
Height range
The height of the stands vary from below 1,5 m to almost 3 m, and is usually mentioned in the stand’s name or code.
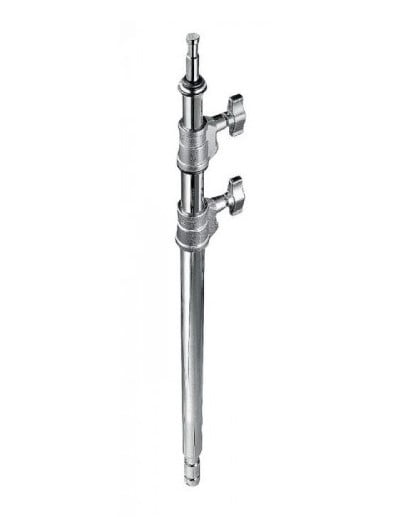
Standard c-stand column has 3 sections (2 risers) and two knobs for fixing position. They differ by height, e.g.:
Grip Arms and Grip Heads
Extension Grip Arm provides an extended grip point for scrims and flags or small lights.
The most common setup is C-Stand + Grip head + 40in Grip extension arm
Grip extension arm
Comes in two sizes: 40″ (102 cm) and 20″ (51 cm)

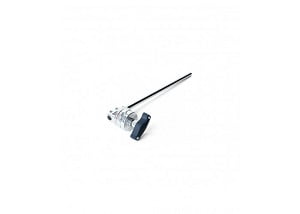
Grip head
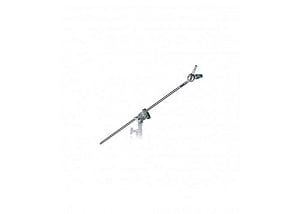
Extension arm with swivel
Work with c-stands
Have a go through every stage of work with a C-stand.
Opening a C-Stand
One way to open a C-stand is to put the riser portion on your shoulder, and twist the legs upwards, starting from the smallest one, until they click into the correct position.
The flaw of this method is the possibility of causing damage with the part of the stand behind your back.

This next method gets rid of that disadvantage by turning the stand upside down and placing the grip head on the ground. This way the legs are right in front of one’s face and the surrounding is secure.
For the sliding leg C-stands, which usually don’t have spring loaded legs, you can simply unlock the knob, turn the stand until the legs fall into place and lock the knob again.

Setting down the stand

When setting the stand, make sure the biggest leg is pointing away from you. This will also be the direction of the grip arm.
By doing this, you ensure that the weight of the grip is acting directly on the biggest leg, which prevents the stand from falling. Not doing this is a serious mistake.
When setting the stand, always put a sandbag on the tallest leg. Ideally, it should not touch the ground.
However, if it does, one simple way to overcome this is putting the bag on the knob. Not only will it lift up the bag, but also put more weight on the center of the stand.


Another important rule here is the placement of the grip head knobs. When looking from behind the stand, having the grip arm facing directly outwards, the large knobs should always be on the right side.
The reason behind this is as follows: when the working load acts on the grip head mounted correctly, the resultant torque can only tighten the head.
If the knobs were set in opposite directions, the torque would easily release the grip head.

Grip heads and arms

Grip heads tend to have several mounting holes of different sizes. That gives them wide compability with products available on the market.
If you are lacking a baby pin, a good practice is to turn the extension arm around, and use it’s end as a pin.

Closing the stand

The first method is to kick the legs closed.
You have to be careful not to get out of balance while standing on one leg though.
You can also put the stand on the outside of your knee and close the legs with one hand.


Another way is to put the stand on your shoulder and close the legs with one hand the same way you open them.
Set organization
When you are organizing your stands and putting them down always put the lowest leg of the first one towards the set, so that the biggest leg of every next stand can be placed over the previous one.
It makes it easier to grab the stands and walk away to the set later.

Useful tips
A bunch of ideas to make your work with C-stands easier, safer and more efficient.

Keep in mind that the back end of the extension arm may not be easily seen when set horizontally and therefore cause some trouble. To prevent any accidents, point the arm down on an angle. It will lift the back of the arm up and out of the way. You can also attach something visible to the end of the arm.
If the arm is too short, you can take two arms and bind them together by clipping them both into the grip head receivers and tightening the heads on both sides. A spare grip head can be mounted on the loose end of the additional extension arm, or it may just be used as a pin.
Remember to put another sandbag on the stand’s leg if you are using this method.


It is always better to set up each piece of equipment separately but if you only have one stand, you can place objects on both sides of the arm. If you do so, remember that the heavier piece of equipment may cause the grip head to loosen, so be aware of the direction of the big knob.
An additional sandbag may help there.
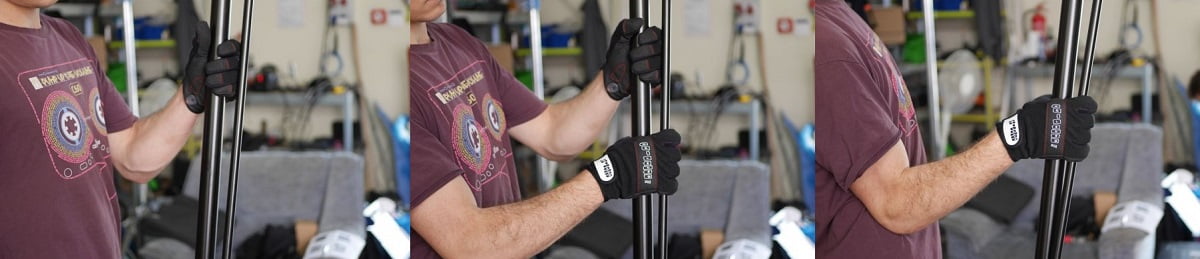
Whenever grabbing a C-stand make sure that you are always wrapping your hand around the riser and the grip arm at the same time. This tip may spare you crushed fingers, when you are handing the stand to someone and they squeeze the riser and the grip arm together.